
BTS: How to tie the Diamond Ring Hip Harness
- SM Angel
- December 2, 2022
- 4:20 pm
This post will take you behind the scenes of the creation of our Diamond Ring Hip Harness. We will cover everything from the source image used for inspiration to the final steps of completing the tie. This post is intended for intermediate riggers or beginners who are ready to take their skills to the next level. If you are a complete beginner, you may still enjoy this post as a glimpse into the tying process, but it may not provide you with all the tools you need to recreate this tie on your own.
Rings used: For this tie, I bought assorted steel rings on Amazon for around $20. I used only larger and slightly smaller rings, as you can see in the photos. These rings are not intended for actual bondage, so please only use them decoratively.
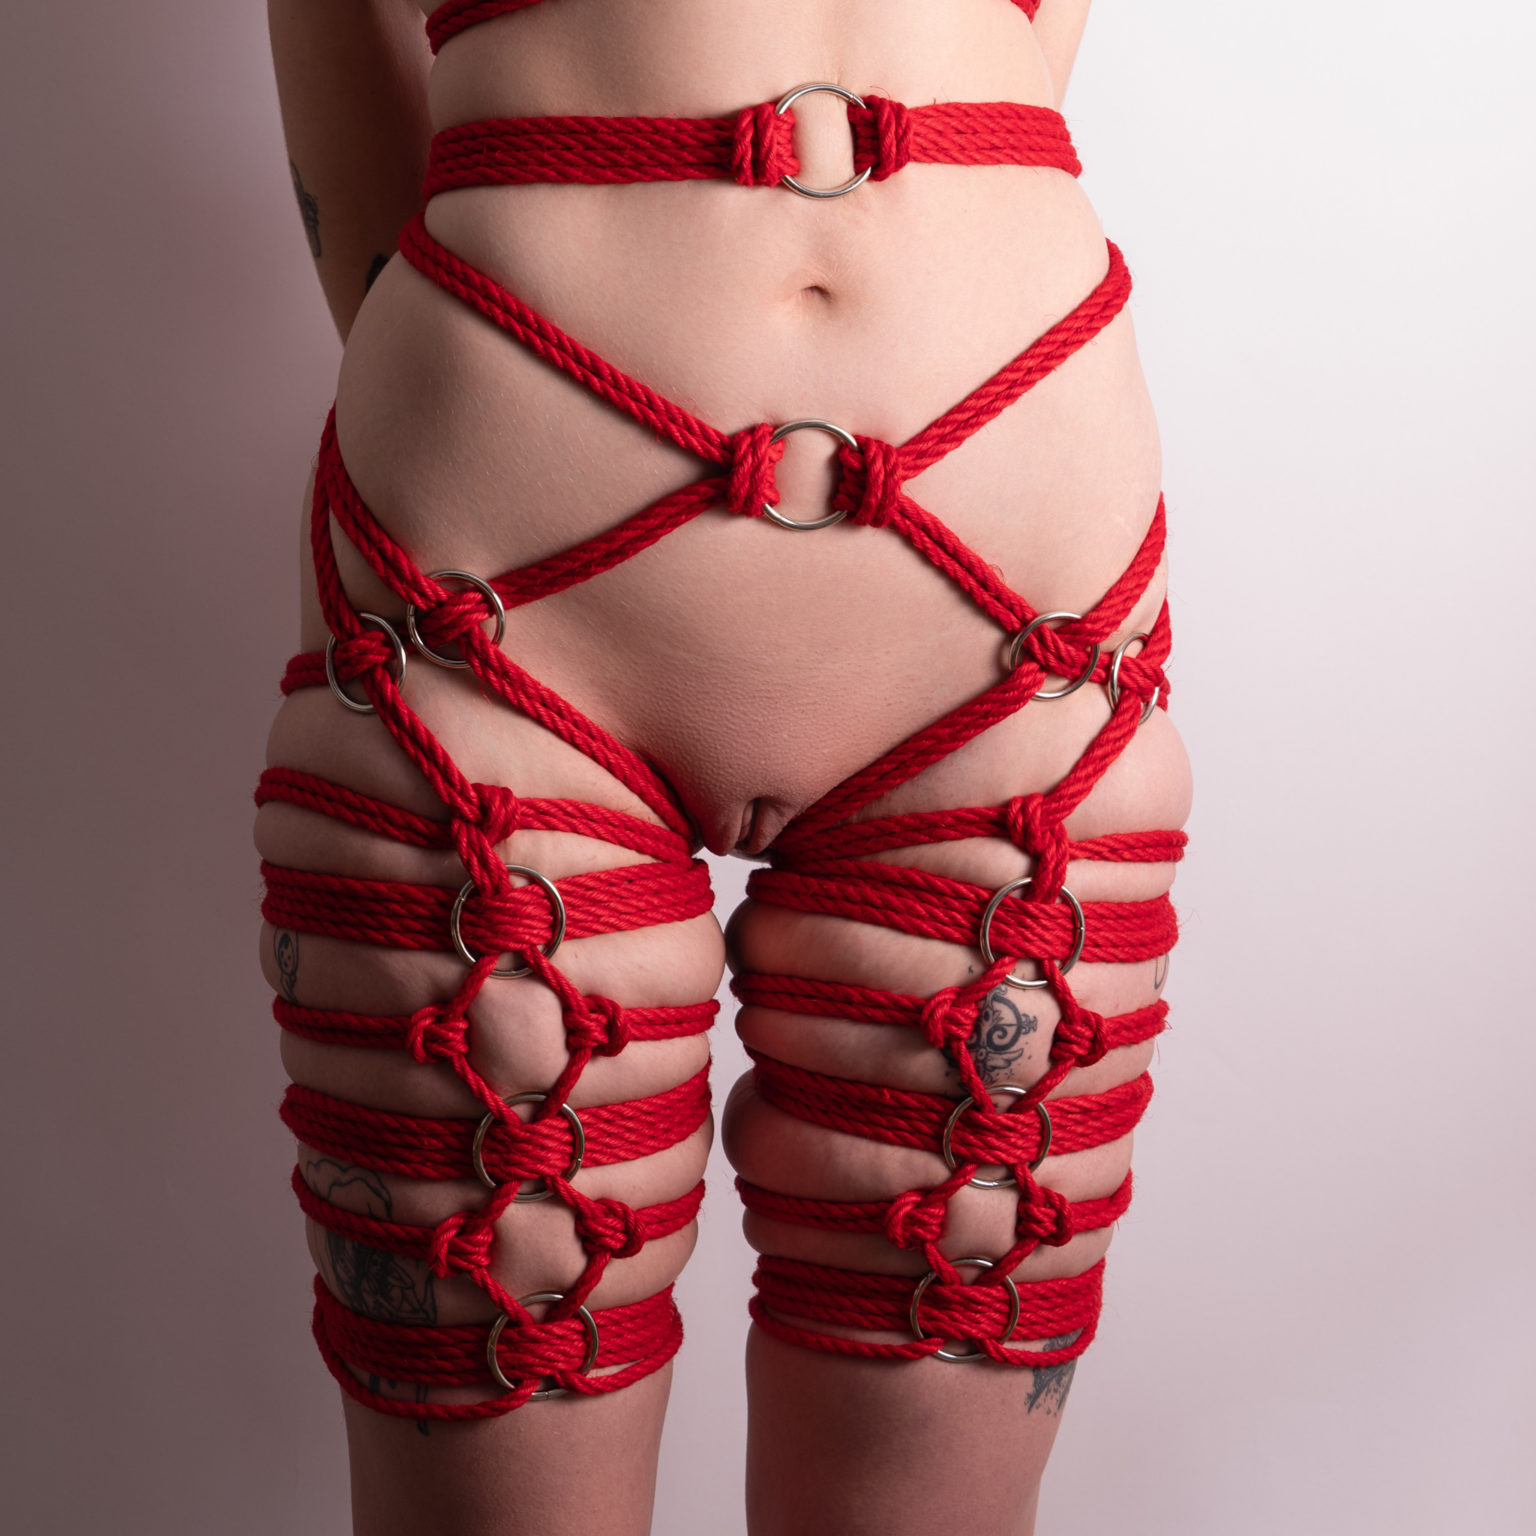
Below is a guide and text describing the process that I used to complete this tie. I will include a picture of the finished tie and then refer to the different parts and colors in the accompanying text.
Final Tie Images


Source Images
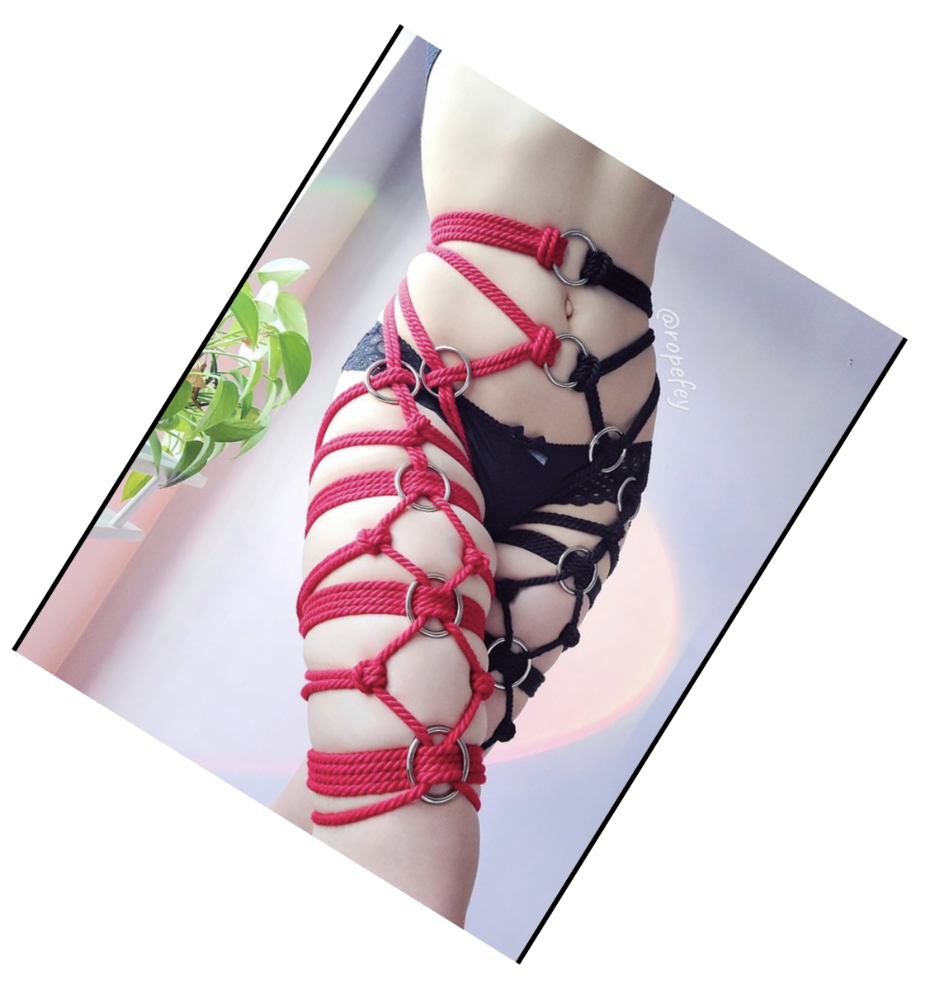
It was a pleasure to use these two beautiful photos to create this tie. The top section is from a photo by @peach_uru on Instagram, and the bottom section is from a photo by @ropefey on Instagram. Together, they create a stunning piece of fashion. Thank you to both of these talented artists for providing the inspiration for this design.

Analysis /Tracing
To create this tie, I used cow hitches to attach the rings between the breasts, and added hitches and rings above the nipples. For the bottom part, I started at the top ring around the waist and worked my way down, carefully considering symmetry. This tie took me a full hour to complete, as it was challenging to remember all the steps. However, the final result was worth the effort.
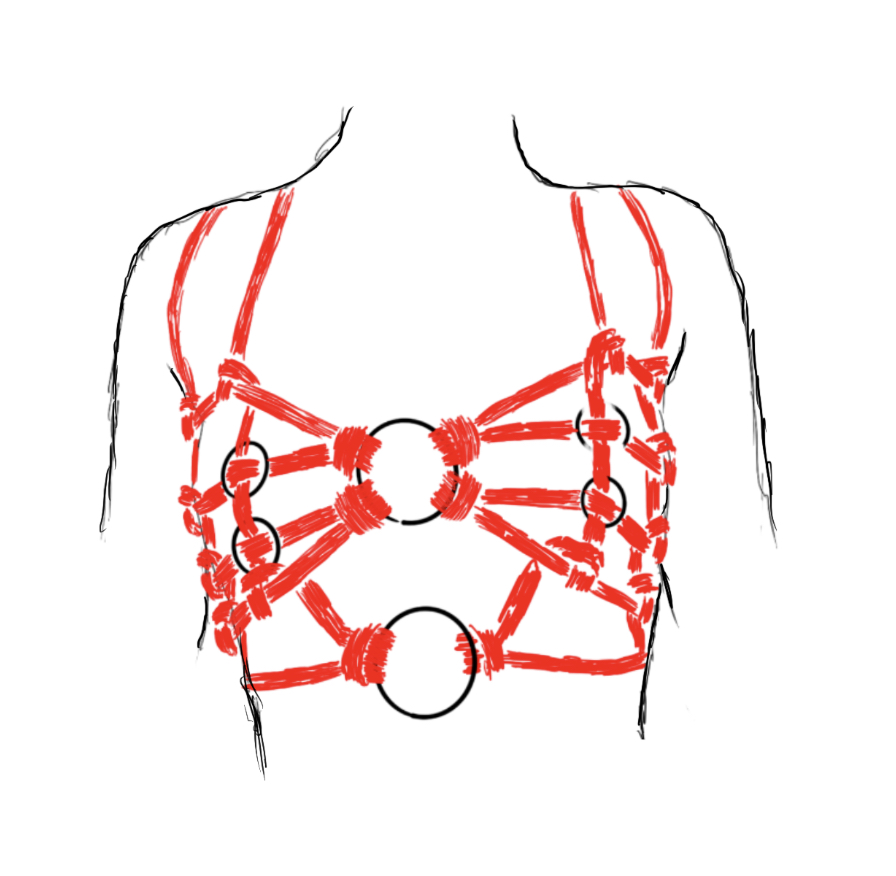
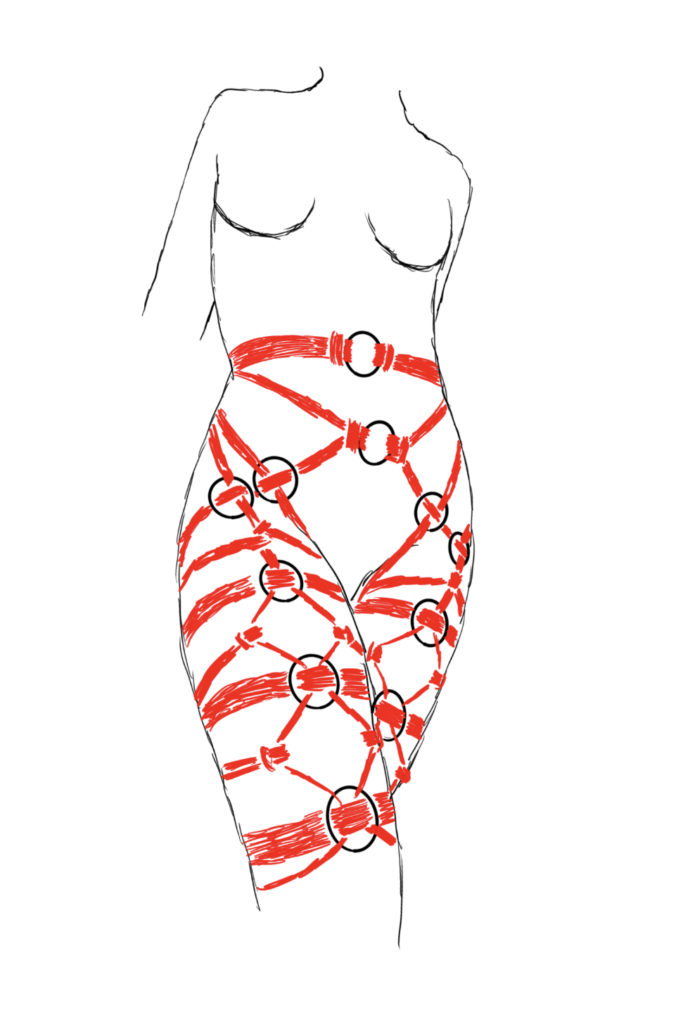
Upper Section
Step 1: Lime Green
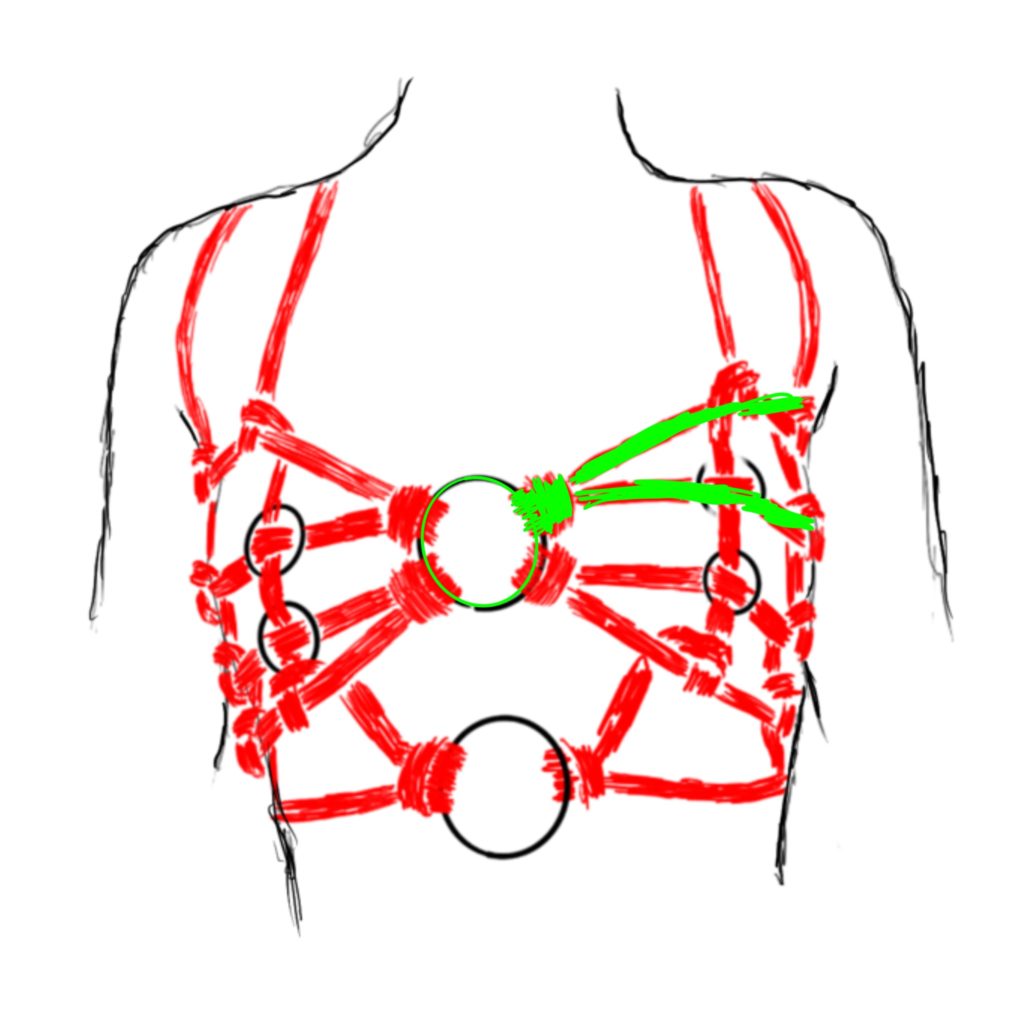
1. Start with a ring between the breasts. I started with a rope that was folded in half twice to first format he cow hitch on the right side of the ring.
Step 2: Blue
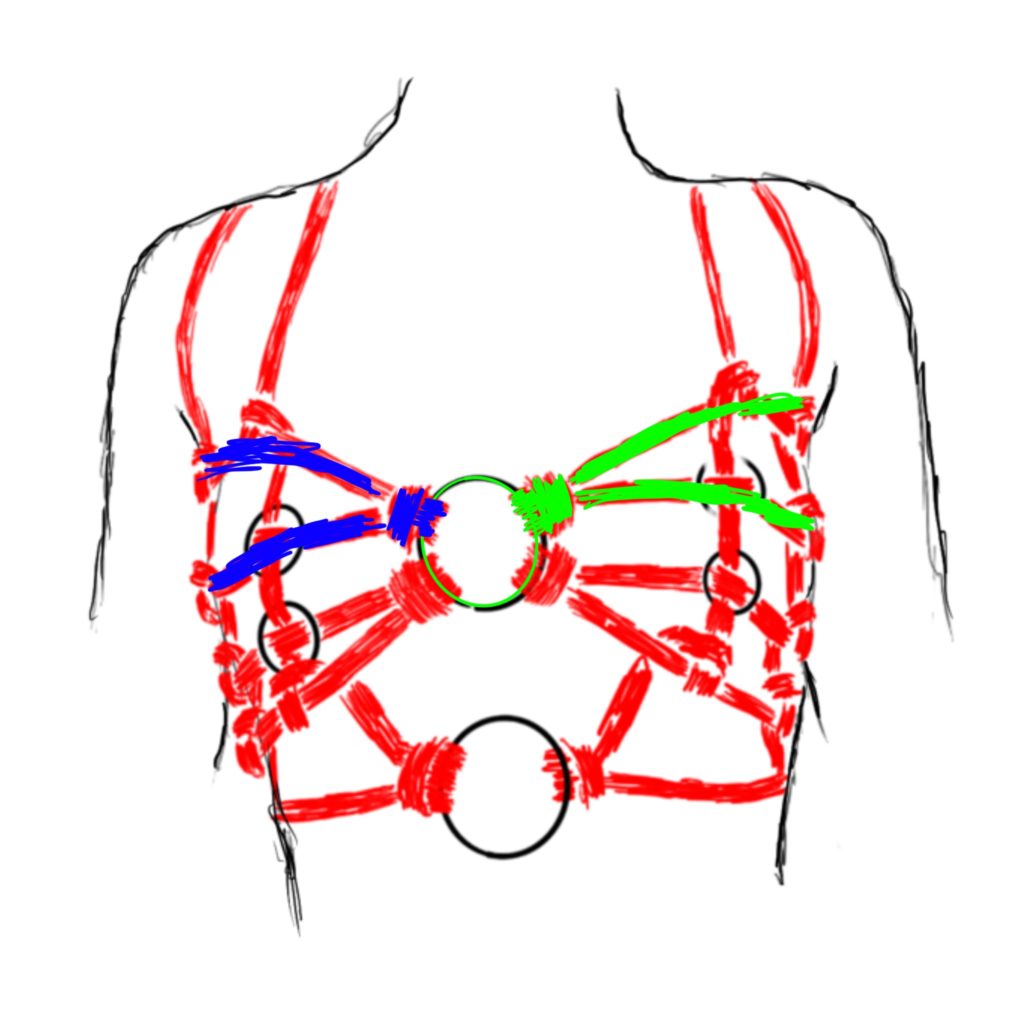
2. I then took one of the tails and went back around the body and formed the cow hitch on the other side with it.
Step 3: Magenta
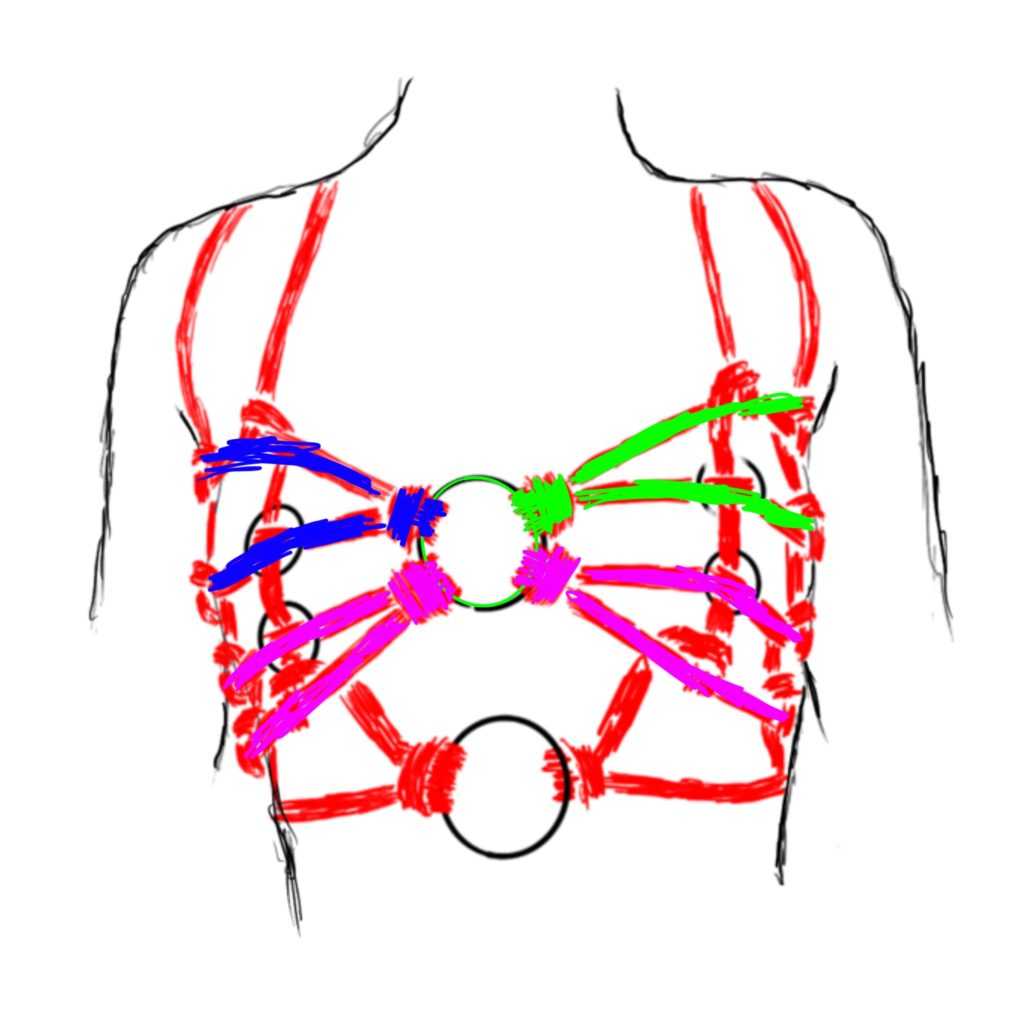
3. I After the ring was in place. I completed the lower cow hitches and just made it so that the top most rope was above the breast and the lower rope was below the breast.
Step 4: Yellow
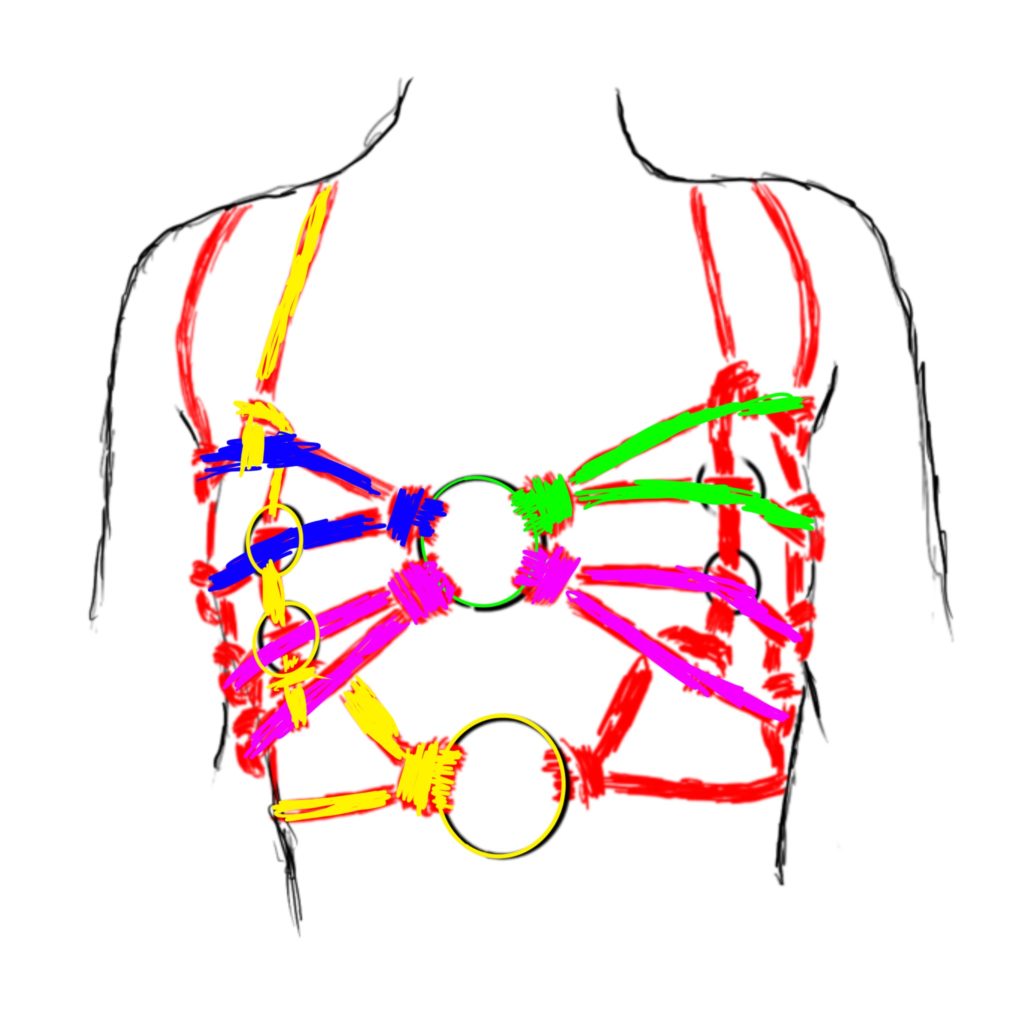
4. The I came down the left side and hitched inward on the first rope. Then it is time to add the first ring. I take the ring and put it on the rope we are currently working with. The ring is then placed on the existing line and a pattern of over under over is used. Please look at the picture at the end for clarification. The next line also gets a ring. On the last line hitch inward again and perform a cow hitch on a new ring. This ring will be floating until you complete the other side. I had the model hold it. Mirror this on the other side and complete the cow hitch.
Step 5: Teal
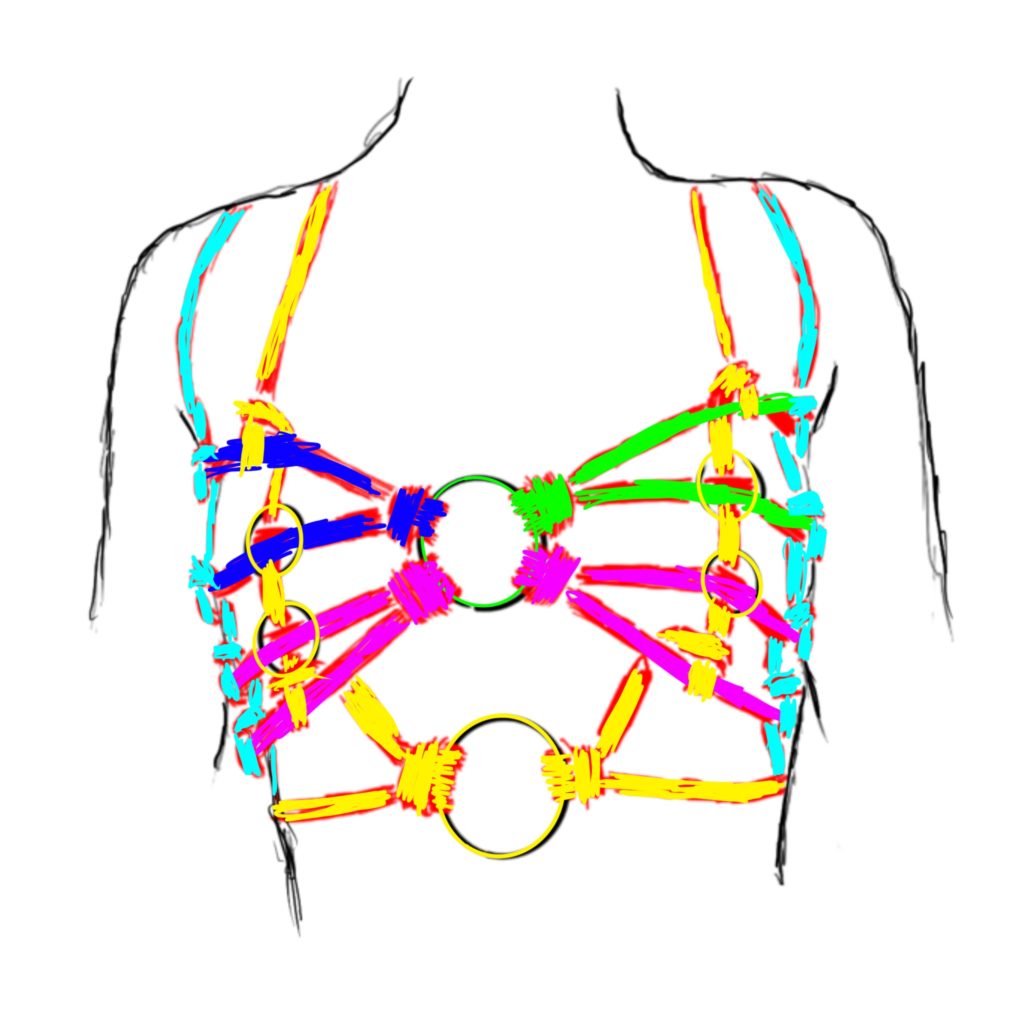
5. Add a second shoulder strap and hitch down the side of the model to keep the rope spacing and make the harness more rigid. Mirror this and the top section is complete.
Top Final

Lower Section
Step 1: Lime Green
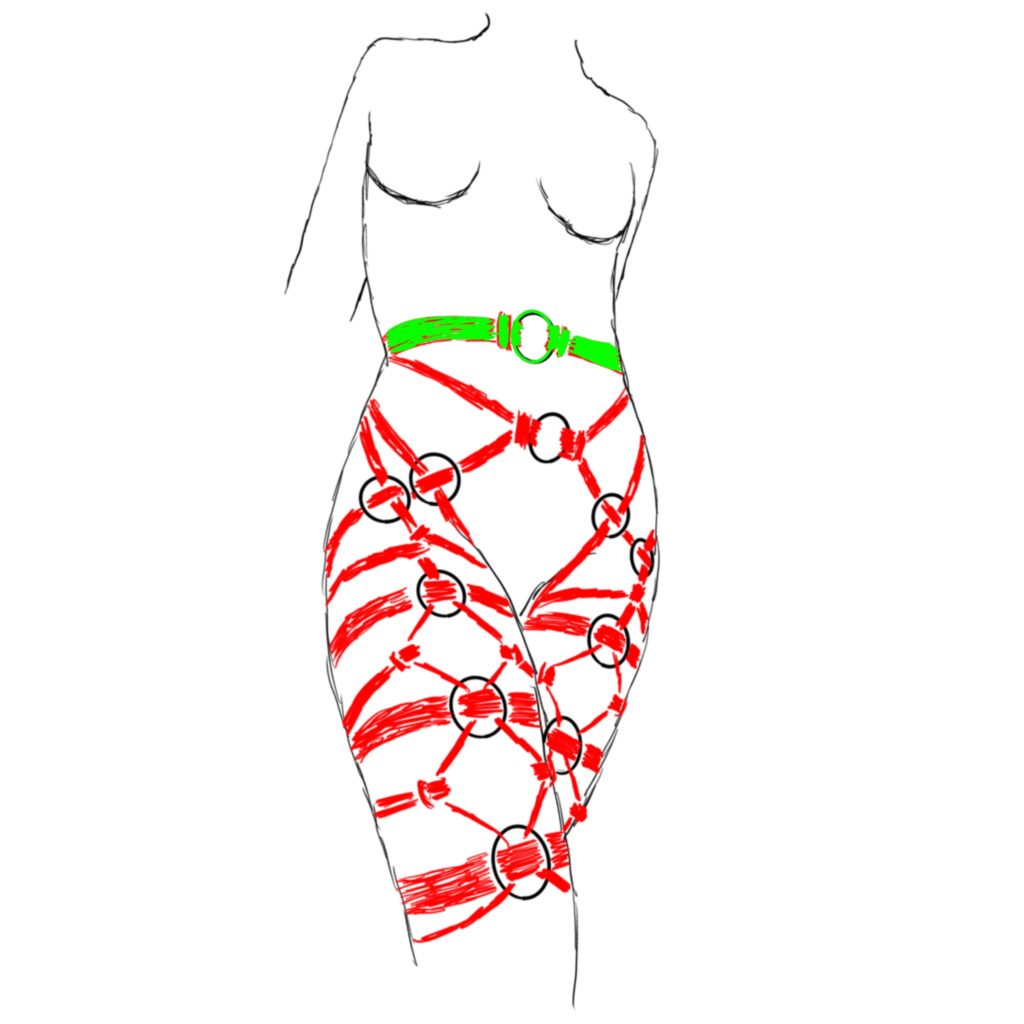
1. I started this tie at the model’s natural waist line. I started with a rope folded in half and then in half again to form the cow hitch on the right side of the ring. I went around the back with one tail and secured the hitch on the other side.
Step 2: Yellow
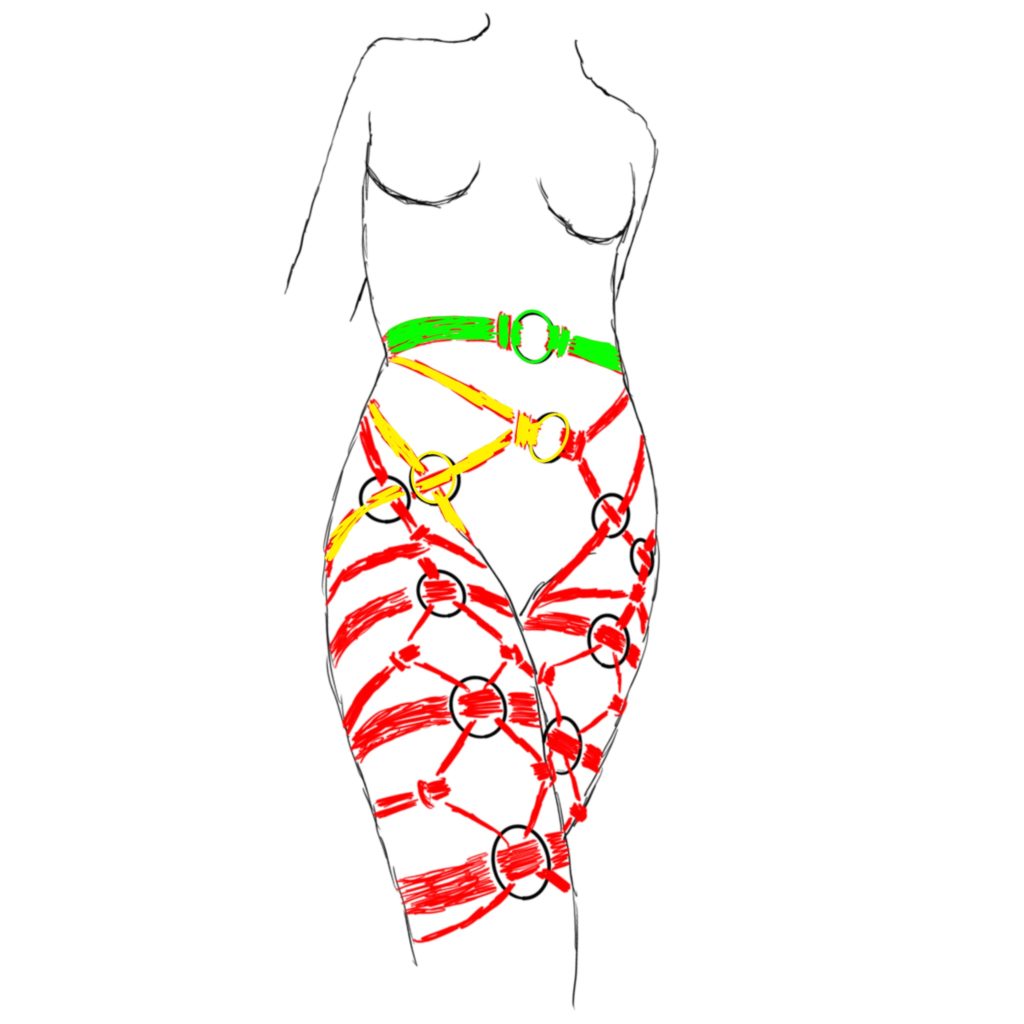
2. I took one of the tails from the waist line and came to the front below the waist band. I went and performed a cow hitch on a ring in the center. This ring will not be secured until the other side is completed. I had the model hold the ring. After I went and wrapped around the leg and up near the crotch. When I passed the line I just created I added a ring to the working end of the rope. With a over under over pattern I attached the ring to the existing line. I exited to the back and mirrored this on the other side.
Step 3: Magenta
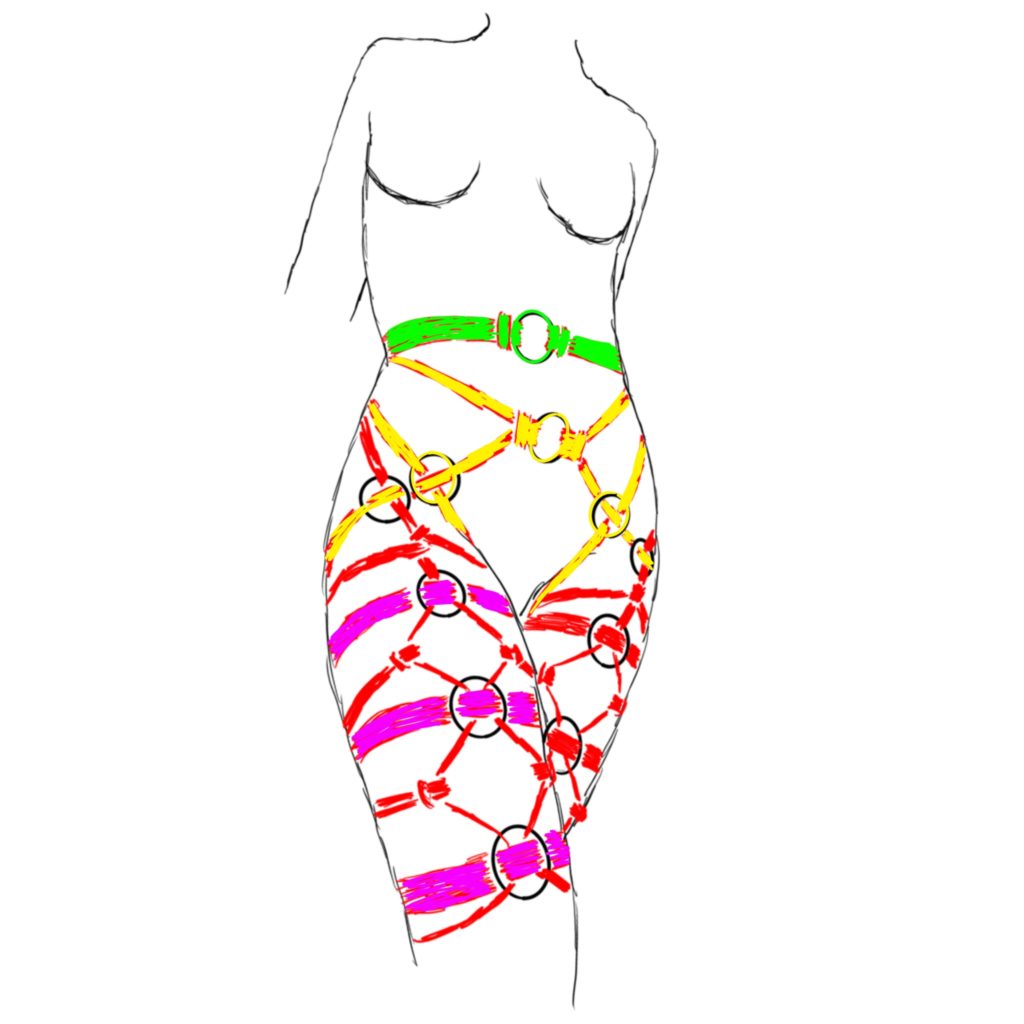
3. Then 3 quad bands are added. I tried to just make these equidistant and end above the knee. I frictioned down the back of the leg to do these bands.
Step 4: Blue
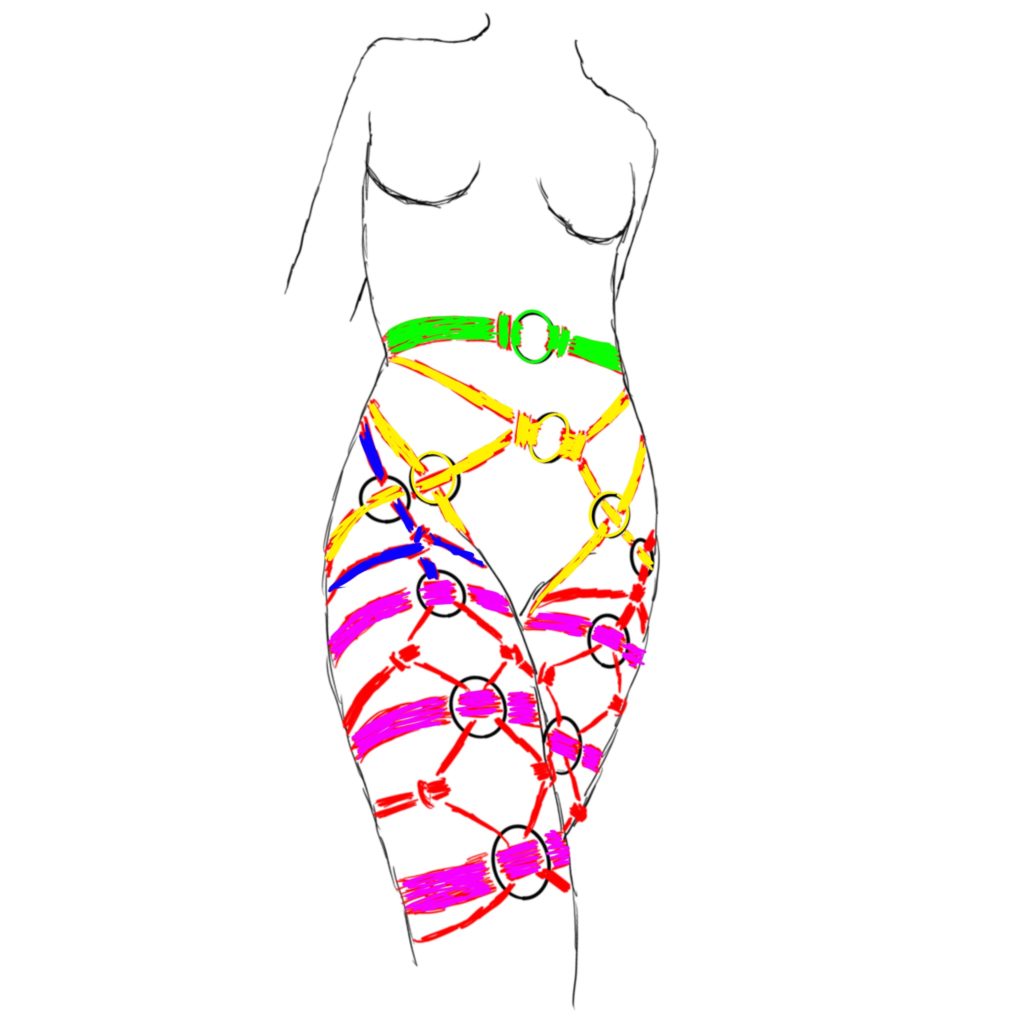
4. I started a new rope from the waist band and came to the front below the existing line on the hip. I put a ring on the working end and secured it with over under over pattern on the existing hip line. Once past it. I went around the thigh one time and reversed tension so that I would be heading directly down towards the three leg bands
Step 5: Teal
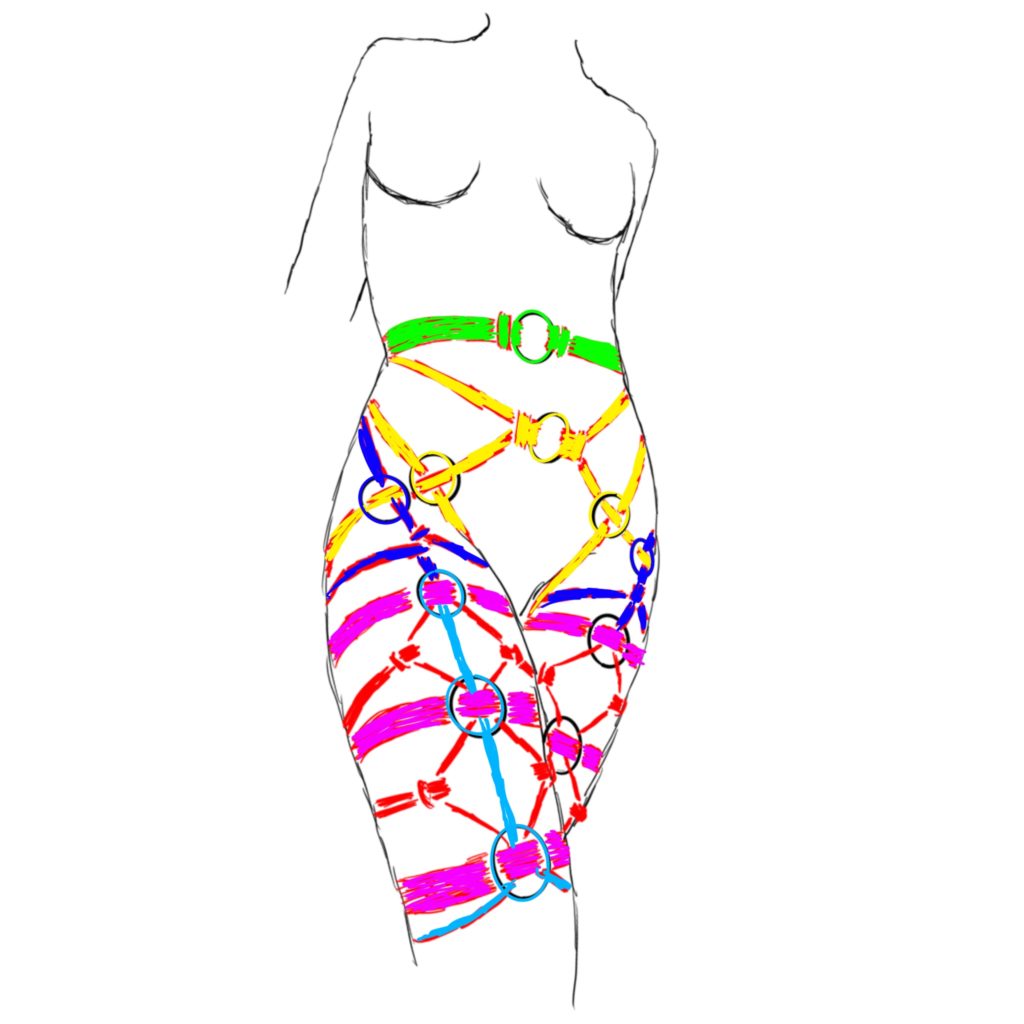
5. I went all the way to the bottom line attaching a ring each time I passed a band. I attached the ring by sliding a ring on the working end and then performing the same over under over pattern between the ring and the existing band. I continued to the bottom then split the line to each side.
Step 6: Lime Green 2
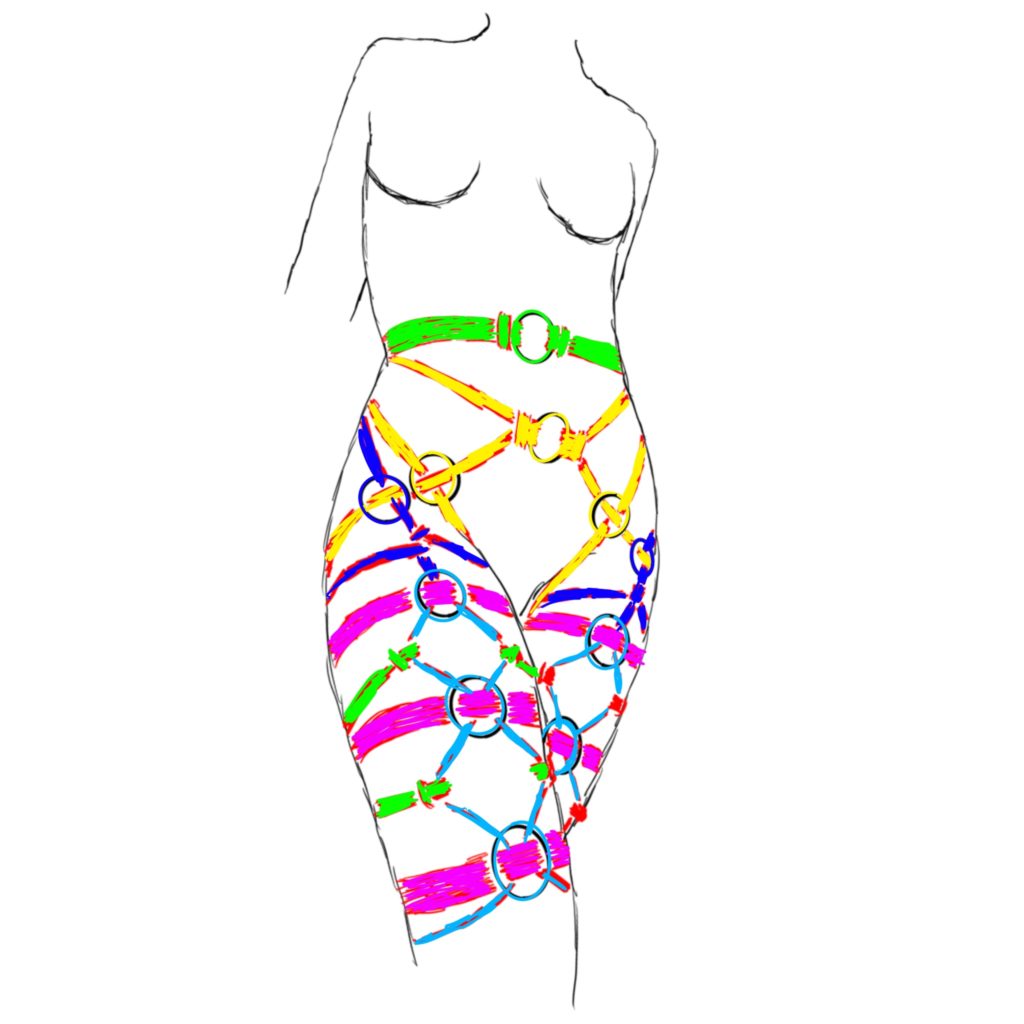
6. All that is left is to split the lines with a cow hitch between each thigh band. This will create the diamond pattern. I made sure to lock each line to the back of the thigh before each cow hitch to ensure the line would be straight and not diagonal when. Pulling the lines apart.
Final Bottom Section
Support Texas Shibari
If you enjoyed this post or found it helpful, please consider supporting Texas Shibari by visiting our Fansly page or making a donation. Your support and donations will help us continue to produce free tying guides for the community. Thank you for your support!